Friday, 17 June 2016

Lime, Chilli and Gin cured Salmon with pickled cucumber and radish, avocado and wasabi mousse, pea shoots and trout crisp

Well, I thought this was a pretty good competition entry, until I realised that it was entered by me, and I'm not a teachers pet so I had absolutely no chance whatsoever. Anyhow, I still thought it was good enough to share on here, as my family enjoyed it and i thought it was one of my nicer looking plates of food.
It may look difficult, and too chefy, but I promise you it's really easy. The salmon can be prepared ahead. And even though the pickled vegetables look complicated, there really simple. All you need is a really sharp knife and a peeler if you don't have a mandolin.
The avocado mousse is super delicious and creamy, just make sure you do it no more than an hour before, otherwise it will discolour. If your serving a lot of people it can easily be plated up before hand, if your luckier than me and have loads of bench space.
Its also be easily adaptable, swap out the salmon with sea trout if you can't find salmon. If your intolerant to dairy just take out the cream, it will be less creamier but otherwise the same. If you can't get hold of the cucumber or radishes both can easily be swapped with carrots or courgette both which could be sliced either way depending on the thickness, but since the radishes were in season i used those.
Ingredients 
For the trout:
X4 100g portions of trout
2 limes, zest
2 chillis, finely chopped
150g salt
150g sugar
150g Gin                                                           

For the pickle:
1 cucumber
100g radish
¼ cup rice wine vinegar
½ tsp sugar
¼ tsp salt

For the mousse:
1 avocado
2 tsp wasabi
1 tbsp extra thick double cream

Pea shoots

1.    Remove the skin from the trout and set aside. Thinly slice the trout.
2.    Dissolve the salt, sugar in the gin, before adding the lime and chilli. Lay the slices of trout on a tray before covering in the cure. Cover and leave to cure for 1hr (or until firm) in the fridge.
3.    Meanwhile, make the pickle by dissolving the sugar and salt in the vinegar. Finely slice the radishes and the cucumber lengthways before adding into the liquid. Leave to pickle for 1hr, stirring occasionally.
4.    When almost ready to serve, blend together the avocado and cream. Add wasabi to taste. Season.
5.    Pat the skin dry, before lightly oiling, season and place on a tray in a hot oven (190c), until golden and crisp.
6.    When ready to serve, wash the trout to remove the cure.

7.    To serve, smear the mousse on the plate, place the trout on top, roll up the cucumber and sprinkle over the radishes and pea shoots.


Wednesday, 15 June 2016

Simple Coconut Biscuits

This is a delicious coconut biscuit, which pairs wonderfully with the previous two desserts, but could also be a gluten free and fancy take an on Anzac biscuit. These are perfect to serve with any tropical dessert, like my passion fruit posset and my passion fruit granita. They would also be perfect with any tropical sorbet or ice cream, in place of the the typical boring and bland wafer.
These are quite obviously no lookers, but if you like coconut then there one of the best coconut biscuits you'll have (as its basically just all coconut).They also seem really healthy as its just egg white which is high in protein, and sugar... errr......maybe not! but at least they don't have butter!!
The only downside is that you have to do the Great British Bake Off pose by constantly staring into the oven until it's baked, as they can quite easily go from a lovely golden colour, to a super dark brown colour, which makes the coconut taste bitter.
These are super fragile, so be careful when you handle them. Along with either of the passion fruit desserts from my previous posts, these can be made up to 3 days ahead just kept in a airtight container, to make dinner party hosting, that little bit easier and less stressful.
Ingredients 

1 egg white 

100g desiccated coconut
1 tsp sesame seeds 
50g caster sugar

1. preheat the oven to 180c 
2. beat the egg whites until fluffy 
3. stir in the sesame seeds, sugar and coconut 
4. lay out teaspoonfuls of mixture onto a non stick lined baking trays, lightly press the mixture in rounds
5. bake for 8 mins, or until golden brown at the edges
6. take out and leave to cool slightly and "set" before moving to a cooling rack and leaving to cool completely


Tuesday, 24 May 2016

Passion fruit Granita

Told you I was having a thing with passion fruit. Don't worry there's more coming too!! The simplest and one of the best ways to eat it is spooned on top of plain Greek style yogurt, but sometimes it should be a hero without anything, just a little bit of sugar and help from the freezer, and you have a super tasty, but refreshing summer dessert.
Its super simple to make along with most of my other desserts, because who has that much time these days. Especially when its summer when all you want to do is be outside and socialising, reading or sunbathing. If your like me then have always wanted to make granita, but always thought you needed some fancy ice cream/sorbet maker, but you actually don't then i hope this recipe will tempt you into how easy it really is. 
To separate the most amount of juice from the seeds, i blitzed the pulp quickly before sieving. I served this as a "pre" dessert, as a small pallet cleanser in between the main and dessert but you could easily serve this as a main dessert, just enlarge the serving dish and portions.  
To serve as a palette cleanser i just popped a few tiny mint leaves on top, as i didn't want the extra passion fruit and coconut to over complicate the refreshing flavour. These coconut biscuits, pictured below are great served with it and my other passion fruit dessert, passion fruit posset (recipe for the biscuits is on its way!!). 


Serves 10 as dessert or 20+ as a small palate cleanser
Ingredients

460g caster sugar
500ml passion fruit pulp, strain to make 250ml juice (around 18-24) 
1250ml of water
2 tbsp lime juice
coconut milk, optional
pulp from 4 passion fruit, optional

1. Put the sugar and water together in a saucepan and stir over a medium heat until the sugar has dissolved. set aside to cool
2. Add the strained passion fruit juice and lime, stir to combine.
4. Pop in a shallow tray and into the freezer, for 2 hrs or until setting around the edges.
5. Using a fork rough up the crystals, and return to the freezer.
6. Repeat each hour, until its all frozen around 3 hrs.
7. Once frozen pop into containers, and keep in the freezer until needed.
8. to serve as a palette cleanser, top with tiny mint leaves. To serve as a dessert, spoon over the extra passion fruit and a little coconut milk. 


Wednesday, 20 April 2016

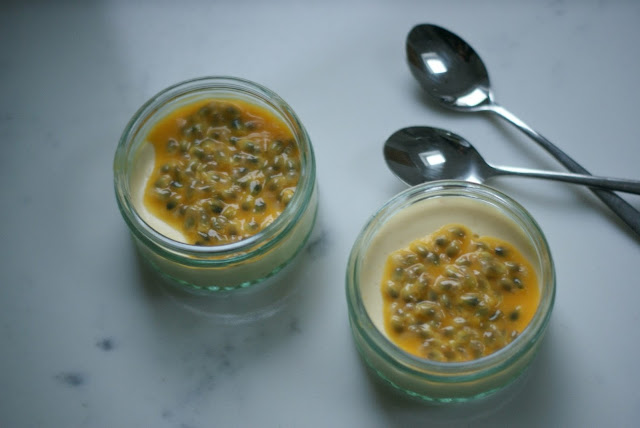
Passion Fruit Posset

With the sight of summer ever closer, the meals get lighter and fresher. The heavy casserole and soup recipes, gradually get pushed to the back of the recipe books. The salad recipes become more used, the desserts become less chocolate and sponge based, and more fresh fruit based. Its also the time i start using all the tropical fruit that i love: I could never tire of eating mango and passion fruit!!
passion fruit dessert
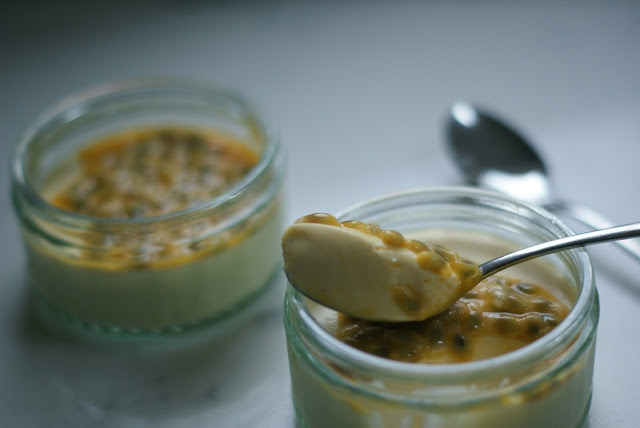
If you had to pick a fancy dessert, that seemed really difficult, but isn't, then a posset would definitely be it. Having grown up watching my mum do a lemon version every time she invited people over, there was no doubt in my mind, that it was easy, and super delicious. With my recent craziness over passion fruit (you'll understand in a few posts), it seemed like an obvious choice to combine the two!! Plus, i had a dinner party that i was cooking for, so it was an obvious choice, as these can easily be made a day or two ahead.
passion fruit dessert
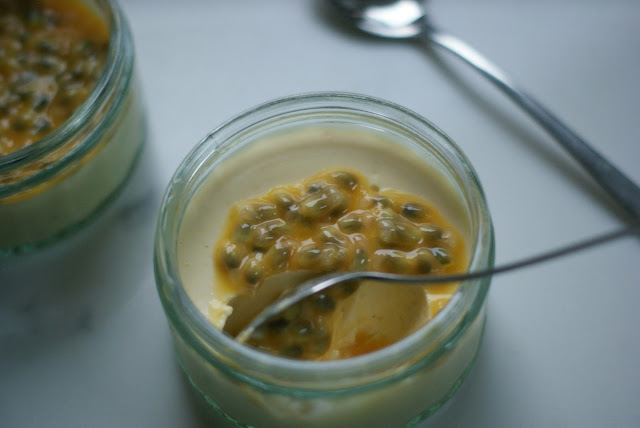
Serve them in individual pots, topped of with extra passion fruit. Serve them with crisp coconut biscuits (recipe coming soon!!!). If you wanted to add another element, top with small cubes of mango, and sprigs of mint for extra colour.
passion fruit dessert
Ingredients

600ml double cream
120g caster sugar
6 passion fruit
1 lime

coconut biscuits to serve, optional

1. Put the cream and sugar, into a saucepan. Gently heat up until the sugar has dissolved, then bring to the boil, and reduce to a simmer for 3 minutes.
2. Meanwhile, scoop out the pulp from 5 passion fruit, and pass through a sieve. I prefer to blitz the pulp, for a couple of seconds, so the juice separates from the seeds better.
3. once the cream has simmered, take off the heat and stir in the passion fruit juice and lime juice.
4. allow to cool slightly, before pouring into ramekins. chill for 4-6 hrs or overnight
5.  to serve, spoon over the flesh from the leftover passion fruit. Serve with coconut biscuits, if wished.
passion fruit dessert

Tuesday, 1 March 2016

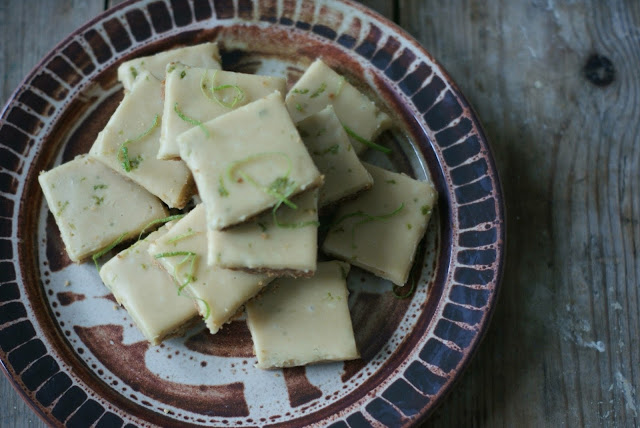
Ginger, Lime and Coconut Crunch

Yes, I do realise that I've made something similar before, but the best recipes are the ones you keep going back to. This twist to a classic ginger crunch, is my new favourite. You could even go wild and combine my other recipe with a twist, to create the ultimate hybrid. Here's the first with added stem ginger, for an extra ginger hit.
ginger crunch with a twist
If you didn't know already I love citrus, especially limes and lemons. I also love coconut, and have coconut milk on my porridge every morning, but I especially love it in baking, like Anzac biscuits or adding it to granola. So paring, some of my two favourite things, with ginger is obviously going to be super tasty, and I won't lie, the inspiration behind the pairing of the lime and ginger, is from ginger mojito( recipe coming soon!!). 
ginger crunch with a lime
The icing I did to taste, but this is a rough guide, it will depend on the size of your limes, and strength of your ginger will also alter, depending on the freshness. Feel free to double the base mixture, if you prefer it a bit thicker and a 1:1 ratio, I like a slightly thinner base than icing, as its a bit easier to eat. If making this in advance, leave the base in the oven for a few extra minutes, for it can really crisp up like a biscuit, as it will soften slightly when you put the icing on top. 
ginger crunch with a coconut base
ginger crunch with a coconut biscuit base
Ingredients
for the base:
1 cup plain flour
1/2 tsp baking powder
2 tsp ground ginger
1/4 cup desiccated coconut 
1/2 cup sugar
125g butter
1/2 tsp vanilla extract

for the icing:
150g butter
90g golden syrup
2 tbsp ground ginger
1 1/2 cup icing sugar
zest of 1 lime
1 tbsp lime juice
1 tbsp ginger syrup

1. preheat the oven to 180c
2. for the base beat the butter and sugar together until light and fluffy 
3. add in the rest of the ingredients, and mix until evenly combined(it's a quite dry mixture)
4. press into a large tin, bake for 20 mins or until golden and firm to touch
5. leave to cool. meanwhile make the icing
6. melt the butter, both syrups and ginger until smooth, then add in the icing sugar and zest. add in the lime juice to taste. Adjust the lime and ginger to taste
7. pour over the base, and smooth to the edges.
8. sprinkle of extra lime zest if wished, and leave to set before slicing.
ginger crunch with a coconut biscuit base

Sunday, 28 February 2016

Seville Orange Marmalade

The Sunday Post: When oranges are in season, i go crazy for the blood oranges, and have at least 1 a day, sometimes even two!! This year i decided to make marmalade, as we have it most weekend mornings, and knew it would get eaten super quickly, and as this post goes up, i can grantee that at least 1 of the large jars have been demolished, and a small dent will have been made in another.
seville orange marmalade thin cut spread on slice of buttered sourdough bread
The oranges are pretty easy to find in the supermarkets at this time of year, and easily spotted, as there often packaged quite differently to normal oranges. It might seem like a bit of faff, having to finely chop all the peel, when you can pick up a jar of marmalade for 50p, but i promise you its well worth the effort, any guests will try and sneak a jar away with them!!
seville orange marmalade thin cut spread on slice of buttered sourdough bread
Just make sure you have enough jars, to store the marmalade in, otherwise you might end up having to use a bowl like me, if you realise at the last minute. I also recommend sterilising your jars before use, so the marmalade will keep for longer unopened.
I also added 1/2 tbsp of black treacle for a more oxford marmalade taste, as this is what we usually have. If you want a full on oxford, add in 1 tbsp of treacle. I also added in the juice and pith of 1 lemon (with the orange pith), to add in more pectin and another element. If you wanted to create something a bit different for a gift, add in the juice, and pith of a couple of blood oranges, for a different colour and taste.
seville orange marmalade thin cut spread on slice of buttered sourdough bread
homemade orange marmalade thin cut
homemade seville orange marmalade
Ingredients

1kg Seville oranges
3.4L water
2kg sugar

1. juice all the oranges into a very large saucepan, along with the water
2. scoop out all the seeds and pulp into a muslin and tie it up, then place into the saucepan
3. finely julienne the rind, or blitz it up depending on how you like your marmalade, personally i prefer to hand cut it to get nice strips
4. add in the rind into the saucepan, and leave to soak overnight, to help extract the pectin
5. bring the pan up to a simmer, leave to cook uncovered for 1 1/2 hrs to 2 hrs, or until the peel is very soft. When the peel is ready it should look slightly see through and feel soft
6. remove the muslin, and squeeze at as much juice as possible. discard the muslin
7. bring to the boil until setting point 105c, without stirring. This may take about 10 mins.
8. leave to cool for 10mins, before filling the jars. Cover with wax disc, and seal. 
breakfast table with homemade Seville orange marmalade and fresh sourdough bread

Friday, 26 February 2016

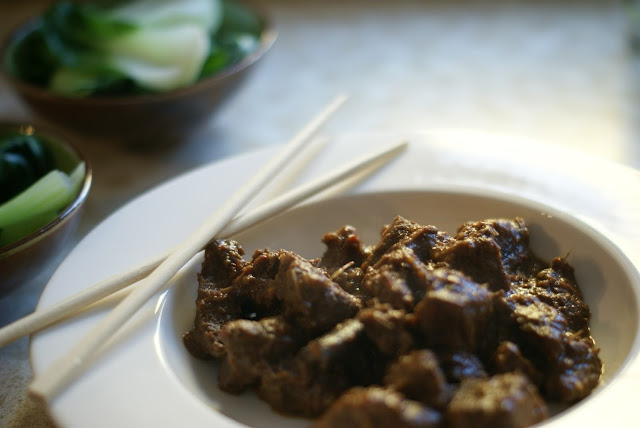
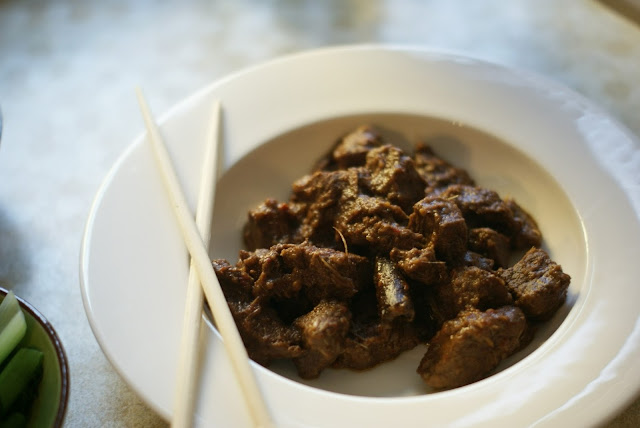
Beef Rendang

We're now well into the Year now, and I'm sure occasionally your healthy eating and fitness resolution, has been broken at least a couple times. Well, i can help on the meal front, but maybe not the exercise front (but new workout gear, is always the best way in my opinion). A good, old curry is exactly what you need, and in my option Thai curry's are the best as the are so fresh but warming at the same time. They are also a lot healthier, without the oil that Indian curry's have.
beef rendang with asian greens
This curry is super easy to make, and one of the most flavoursome, I've ever had. Plus, once you've seared the meat, you add in the rest of the ingredients, and leave it, so it's perfect for a dinner party, especially at this time of year as its so warming with the chilli. Its also super easy to double up if your feeding a large crowd.
thai beef rendang with asain greens
I would also like to apologise, that i couldn't wait any longer to take photos of this, because this is my old worktop, and as you can probably tell by previous posts, that my new worktop is much more photogenic.
beef rendang with asian greens
 If your worried about the meat being tough, i sometimes cook it fully with the lid on, so the liquid doesn't evaporate, then for the last 30mins of cooking, i take the lid off, to reduce the liquid, until it thick. Serve with Asian greens, lightly steamed. If you are feeling hungry serve with fluffy coconut rice. For a hotter curry leave the seeds in more of the chillis, instead of taking some out.
beef rendang with asian greens
Ingredients

2 red onions, roughly chopped

5 garlic cloves, peeled
2 tbsp grated ginger
6 large red chilli, 3 deseeded, 3 with seeds
3 lemongrass stalks, white part only
3 tbsp oil
2 tbsp ground cumin
2 tbsp ground coriander
2 tsp turmeric 
2kg stewing steak
400ml tin coconut milk
2 cinnamon sticks
1 tbsp tamarind paste or lime juice
2 tsp sea salt
1 tbsp soft brown sugar

1. place the onion, garlic, ginger, chilies, and lemon grass into a food processor and blend to a paste.

2. heat the oil in a large heavy-based pan over a medium heat. Add the paste and the cumin, coriander and turmeric and cook, stirring, for 2 mins or until fragrant.
3. Add the stewing steak and cook over a high heat for 4-5mins or until the beef is just sealed.
4.  Add the coconut milk, 400ml water, cinnamon stick, tamarind paste, salt and sugar and bring to the boil.
5. Reduce the heat and simmer, uncovered, for 2- 2 ½ hrs , stirring occasionally, or until the meat starts to break up and most liquid has evaporated. 
6. Serve with steamed rice and steamed asian greens e.g. pak choi.

beef rendang with asian greens